Crumpets

Crumpets | pajamabaker.com

I never had a crumpet growing up.  You’d always hear the phrase “tea and crumpets” when people would make comments related to England, but before moving to London I couldn’t even tell you what a crumpet was. But then I ate one. And then I ate another. And then I decided that Americans are seriously missing out on crumpets.

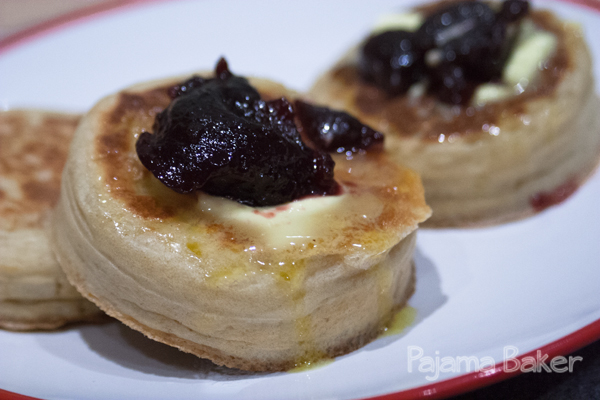
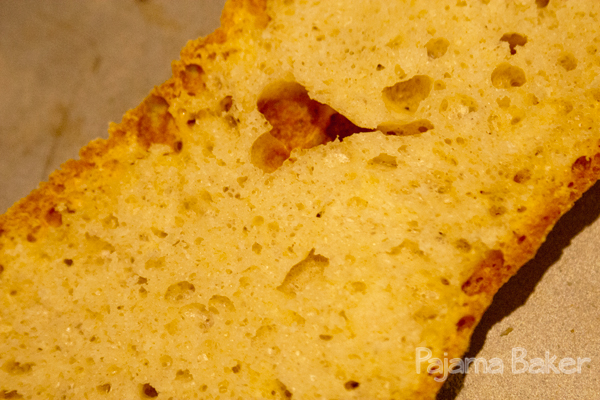
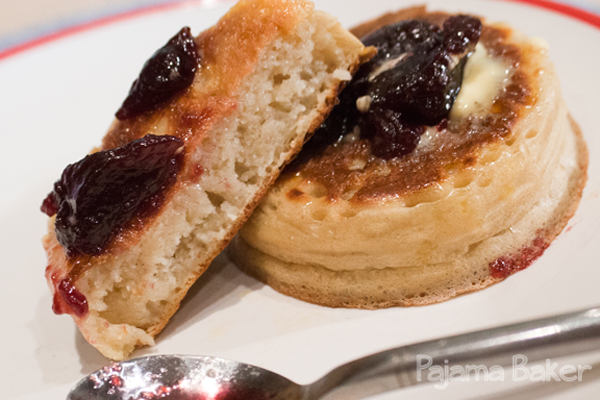
A crumpet is sort of a cross between a pancake and an English muffin. They’re fluffy, flat disks that you cook on the griddle like a pancake, but they’re thick like an English muffin and have a sort of slightly chewy texture to them in the middle due to all of the tubes of air running through them.  I love to eat them with a bit of butter and honey, but others like them with jam, or Ben loves his smothered in peanut butter.

They’re pretty simple in terms of ingredients, but they definitely take some practice to get them just right. Turn them too soon, and they won’t be tall and fluffy. Turn them too late and they’re burnt on the bottom. So these need to be watched carefully!

Ingredients

  • 175 grams bread flour
  • 175 grams flour
  • 14 grams (2 packets) of yeast
  • 1 teaspoon sugar
  • 350 ml warm milk
  • 150-200 ml warm water
  • 1/2 teaspoon baking soda
  • 1 teaspoon salt
  • vegetable oil for cooking

Directions

1. Mix together the two types of flour and your yeast in a medium-sized bowl. Dissolve the sugar in the warm milk, then pour over the flour and mix with a wooden spoon for 3-4 minutes until you get a smooth batter. Make sure you mix for the full amount of time to get air bubbles into the mixture. This will produce all of the holes of a quintessential crumpet.

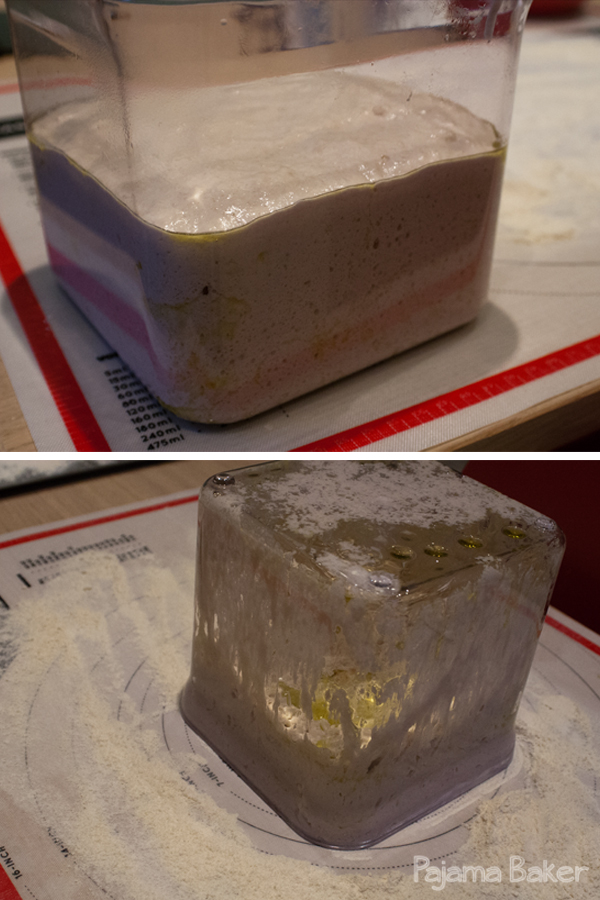
2. Cover your mixture and leave it to rest for 20 minutes to an hour. The batter will rise then fall once it’s ready.

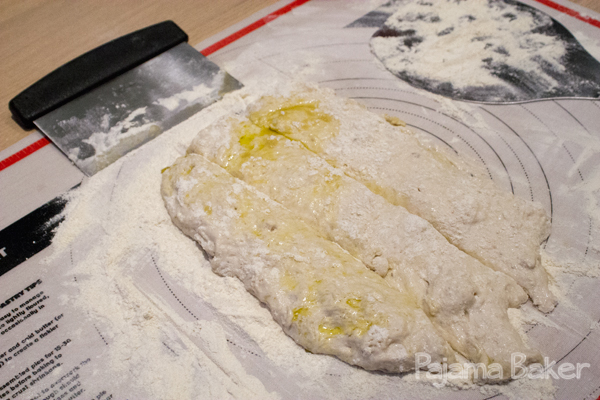
3. Mix your baking soda and salt with the warm water, then beat the mixture into your batter.  Add about 3/4 of the water and keep adding it until you get a thick, but still runny consistency. Cover and rest for another 20 minutes.

Crumpets | pajamabaker.com


4. Heat your griddle over a medium heat, then lightly grease the inside of four crumpet rings using the vegetable oil. Also lightly grease your hot griddle with the oil and place the prepped crumpet rings onto the griddle.

5. Pour 4 Tablespoons of your batter into each ring. After a couple minutes, bubbles will start to appear on the top (like you see with American pancakes) and the surface will set up. Once this happens, flip your crumpet and the ring over and cook on the other side for another 3 minutes until golden.

Crumpets | pajamabaker.com

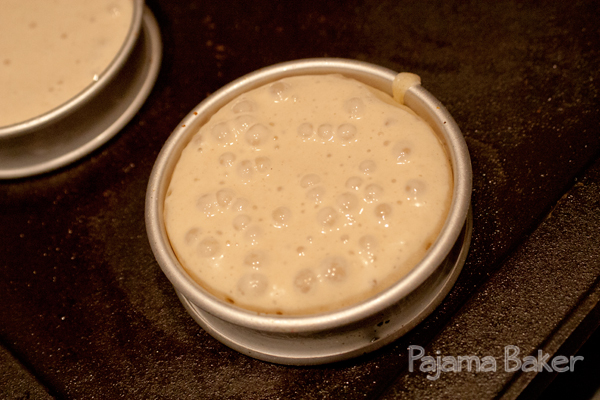
This one’s not quite ready to be flipped…
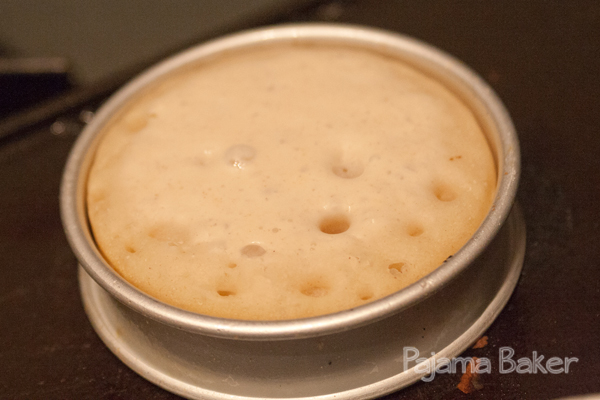
Crumpets | pajamabaker.com

….ready to flip!!


6. Serve the crumpets while they are still warm, or let them cool and stick them in the toaster before serving.

Crumpets | pajamabaker.com


Ciabatta Bread

Ciabatta | pajamabaker.com

This week’s technical challenge was the ciabatta loaf. When Paul said to the contestants “be patient” – he wasn’t kidding. This dough takes forever to rise and it’s an investment in time to bake. Frustratingly, the contestants on Great British Bake Off were challenged to make these loaves in an afternoon. So I was a bit surprised when I went to the official Paul Hollywood recipe they posted only to find that this was going to be an all day (overnight in fact!) project…

My loaves turned out a little flatter than I would have liked, but that may be due to my handling the dough a little too much, but I was successful in getting the uneven air holes in the final bakes (a characteristic of good ciabatta!). One of my loaves even surprised me with a heart inside! Ben ended up using these to make paninis for lunch this week, so they definitely were put to good use!

Ingredients

For the starter dough:

  • 250 grams bread flour
  • 190 ml water
  • 15 grams yeast
For finishing the loaves:
  • 250 grams bread flour
  • 10 grams yeast
  • 190 ml water
  • 12 grams salt

Directions

1. The night before you want to bake your loaves, make the starter dough. Mix the flour and water in a large bowl, then add the yeast. Whisk for three minutes and leave to rise overnight (or at least eight hours).

2. The next day, add the remaining flour and yeast to the bread mixture and mix well. Then add in the water and salt to form, mixing for about five minutes until it forms a wet, sticky dough.

3. Transfer your dough to a large oiled square container and leave it to rise for at least one hour, or until it doubles in size.

Ciabatta heart | pajamabaker.com

4. Quickly flip the container upside down onto a heavily floured work surface to turn out your dough. Leave it to rest for another 30 minutes. In the meantime, preheat your oven to 465ºF (240ºC).

5. Cut the dough into 3 long strips and gently shape them into ciabatta loaf shapes.  The dough is really sticky and runny, so this can be a bit tricky. Just don’t overwork the dough, or you’ll lose all your lovely air bubbles inside and the loaves will turn out really flat.

Ciabatta heart | pajamabaker.com

6. Place your loaves onto a baking sheet lined with baking paper, then leave them to rest for 10 minutes. This will help the dough to get that last bit of rising in before baking, hopefully helping to make up for any air lost while handling the dough.

7. Bake your loaves for 25 minutes until golden, then immediately transfer them to a wire rack to cool.

Ciabatta heart | pajamabaker.com

Twisted Cinnamon Loaf

CinnamonLoaf_6CinnamonLoaf_7

Ben and I spent the weekend with friends in Edinburgh for the long Bank Holiday weekend. It was a fantastic trip! We saw some wonderful comedy shows as a part of the Fringe festival, and mostly ended up wandering around the city. It was so crowded with several different festivals going on all at once, but the weather was lovely and we were in good company.  All in all, a nice mini getaway before the fall kicks off!

After last week’s bread episode of GBBO, I found myself really inspired to try my hand at making a filled loaf. I’d seen a photo on Pinterest for a twisted cinnamon loaf, but most of the recipes used canned cinnamon rolls and just didn’t seem all that appetizing. So about mid-way on hour hour-long flight home, I decided to give it a go.

Yes it is more effort than buying a can of cinnamon rolls. But it is all so simple, and you just feel better knowing that you made it yourself – that there are no preservatives or weird stuff mixed in. Plus, it was a nice way to keep the relaxing vibe from the weekend away.

Ingredients

For the bread dough:

  • 500 grams (3 1/2 cups) strong white flour (white bread flour)
  • 10 grams (1 teaspoon) salt
  • 50 grams (1/4 cup) sugar
  • 2 packages yeast (14 grams)
  • 30 grams (1 Tablespoon) butter
  • 2 eggs, lightly beaten
  • 50 ml (1/4 cup) warm milk
For the filling:
I just eyeballed mine, so all of these are approximate!
  • 75 grams (3 Tablespoons) very soft butter
  • 150 grams (3/4 cup) brown sugar
  • 1 1/2 Tablespoons cinnamon
For the glaze:
I just eyeballed mine, so all of these are approximate!
  • 65 grams (about 2 cups) icing sugar
  • A few Tablespoons of milk
  • A few drops vanilla

CinnamonLoaf_3BrownSugarBearThis little guy is my brown sugar bear – he’s ceramic and helps keep the brown sugar from turning to a brick. Just soak him for awhile in water, then toss him in your brown sugar container!


Directions

1. First, make your dough: Mix together all of your ingredients except the warm water. Be sure to separate when you add the salt and the yeast, because salt will kill your yeast and you won’t get a nice rise. Add about half of your water and let all the ingredients combine. Gradually add in the rest of your water until it all comes together into a dough.

2. Turn your dough out onto a lightly floured surface and knead it for about 10-15 minutes until it gets really smooth and stretchy. Lightly oil a large bowl with a bit of olive oil, then place your dough in, cover with plastic wrap or a clean towel, then leave in a warm place to rise for about an hour or so.  The dough should nearly double in size when it’s ready.

3. Now, the funs starts!  Prep a baking pan by lining with baking paper and set aside.  Re-flour your work surface and turn out your dough.

HowTo_14. Grab your rolling pin and roll your dough out into a rough rectangle that’s about 1/4-inch thick. It doesn’t need to be perfectly square for the loaf to work, so don’t stress about it.

5. Then, using a pastry brush, cover the surface of the dough with a good hearty coating of your very soft butter.

HowTo_26. Cover the surface of your dough with your brown sugar and cinnamon mixture so that it all has an even coating. Be generous though, as the sugar will melt and create all of the delicious gooey-ness on the inside of  your loaf!

7. Next, roll up your loaf, making sure you roll with the longer edge, not the short one. You want to roll it relatively tightly so that you get a good spiral, but not so tight that the dough won’t have room to rise or bake properly.

HowTo_38. Once it’s all rolled together, pinch the seam closed, making sure it’s as sealed as possible.  Then, slice your log-like loaf down the entire length so that you get two halves.

9. Pinch together the two ends of each of your halves, then start to twist them together, looping one over the other until you go down the entire length of your dough.HowTo_410. Once you’ve reached the other end, pinch those together as tightly as possible.

11. Carefully lift the two ends of your twist and bring them together to create a wreath shape. Now, make sure you seal off the two ends as best you can, so that the loaf doesn’t unravel in the oven!

HowTo_5CinnamonLoaf_5CinnamonLoaf_4HowTo_612. Mix together whatever’s left of your brown sugar and cinnamon mixture with your very soft butter. Pop it in the microwave for a few seconds so that it gets even softer, but not melted! Brush this mixture over the top of your loaf to add more delicious golden brown gooey-ness.

13. Preheat the oven to 325ºF (170ºC), then set your loaf in a warm place to rise for about 30 minutes while your oven preheats.

14. Bake your loaf for about 20-25 minutes, until it turns a really rich golden brown.

15. While your loaf is still warm, mix together the icing sugar and vanilla with a bit of milk, gradually adding the milk until you reach a very runny consistency. Brush this over your warm loaf, then allow it to cool (or not, just get stuck in!).

CinnamonLoaf_1CinnamonLoaf_2Mmmmmm, gooey.


Beer Bread

Beer Bread | pajamabaker.comSoooo, I went a bit overboard this weekend after baking the Cherry Cake. I had everything all baked, the cake was cooling, and before I went to put the bit of butter I had left over back in the fridge I said to myself “so what else can I make?!” And suddenly I found myself scouring my cookbooks until it hit me: bread. I’m going to make some bread.  It wasn’t like I had other things to be getting on with on a Sunday or anything, other than wedding plans, laundry, and cleaning the flat from the dinner party we had hosted the night before. Nope! No I had plenty of time!

Actually, this bread was super quick to make: toss all the ingredients together, knead for a bit, rise for a bit, shape, rise… bake. Done.


But I had to take it a step further. In the name of blogging. And experimenting. And photos of something besides a lump of bread.

Ladies and gentleman, I give you, the beer bread grilled cheese sandwich, made with some strong white cheddar cheese:

BeerBread2

Just look at that practically sexual melting going on! And those grill lines!

BeerBread3

And it was so creamy that the top started sliding off when we were photographing it… oops!


Ingredients

From Paul Hollywood’s 100 Great Breads

  • 1 1/2 cups whole wheat flour
  • 1 2/3 cups strong white flour (white bread flour), plus extra for dusting
  • 1 Tablespoon salt
  • 1 package yeast
  • 1/4 stick of butter, softened
  • 1 1/4 cups beer – no Bud Light or nasty lagers allowed! Although, I used an entire bottle in mine! Magic Hat #9 that I brought back with me from the States. Mmmm.BeerBread5

Directions

1. Put all of your ingredients into the bowl of your mixer, fitted with the dough hook. Mix until all of the flour gets picked up and it’s a sticky-ish ball.

2. Tip the dough out onto a floured surface and knead for about 5 minutes until the dough gets really smooth and elastic. Make sure you stretch it as you knead to get the gluten proteins going. Add a tiny bit of olive oil to your bowl, then put the dough ball back in. Place it in a warm spot covered with a tea towel to rise for 1 hour. It should at least double in size.

3. After it’s risen, turn the dough out onto your floured surface again and shape it into a ball. This works best when you stretch the top around to the bottom, tucking it under so the top is smooth and even. Then flatten it slightly and slash an X across the top with a sharp knife.  Slashing it helps control the way the bread will rise, to ensure that it rises evenly over the top.

4. Place your shaped loaf onto a baking sheet lined with baking paper and let it rise for another hour. In the meantime, preheat your oven to 400°F (200°C).

5. Bake your loaf for at least 30 minutes until it starts to turn golden brown and get a nice hard crust. (I could have actually done with another 5 minutes on mine, it’s a tiny bit too light!) Once it’s done, take your loaf out of the oven and leave it on a wire rack to cool. Make sure you use the wire rack so you don’t get a soggy bread bottom – as this bread is really moist!

BeerBread4

While I couldn’t enjoy this loaf (although I was tempted! Gotta stick to the diet!), Ben said the grilled cheese we made with it was great, and it went down a real treat at the office!  Some people used it for a mid-morning snack toasted with some butter, someone else made a sandwich, and someone else dipped it in his lunchtime soup. So it was pretty versatile! Definitely a good use of using up what we had in the pantry.

Orange Vanilla Monkey Bread

MonkeyBread2

Last week was my birthday, and Ben took me out for a day in London followed by dinner and drinks at a retro bowling alley with friends. Along with lots of cards from friends and family, I also received a surprise birthday package from my Aunt containing this:

Monkey


HOW ADORABLE IS HE?!?!?! I literally could not stop playing with him for at least an hour, posing him around the house to find a perfect spot for him to perch before finally deciding to put him in our pie dish (next to my bagels to take to work for lunch) so that he can watch as we cook. I don’t know what I love more about him, his little hat and slippers, or the fact he’s clutching a wooden spoon. Either way, he was a fantastic gift!

In honor of our newest houseguest, I decided to make an old family favorite: monkey bread. Except when I was looking for a recipe, I came across one from The Pioneer Woman, who I swear has some of the best recipes for everything. Given that I’ve used a lot of her recipes for dinners, I knew I couldn’t go wrong with her twist on sharing favorite: orange and vanilla.

I added my own little touch by making a quick cream cheese glaze to to drizzle over the top. Normally you make monkey bread with pre-packaged biscuit dough, but you can’t get that here in the UK; so I made up a quick basic dough to chop up and use instead and it was just as tasty.

This bread is great for a brunch, as you can put it in the center of the table and let everyone pick away at all the little bits. Just be sure to have plenty of napkins on hand for sticky fingers!

Ingredients

For the bread:

  • 3 tubes refrigerated biscuit dough
  • 1 cup sugar
  • 2 oranges, zested
  • a pinch of salt
  • 1 cup (230 grams) salted butter
  • 3/4 cup brown sugar
  • 1 Tablespoon vanilla
For the cream cheese glaze:
  • 1 8-ounce package cream cheese, softened
  • 3 Tablespoons icing sugar
  • milk, if needed

MonkeyBread

Directions

1. Preheat oven to 350° F (approx 175°C).

2. First, chop up all of your biscuit dough into small, bite-sized pieces. In a large zip-top bag, mix the sugar, salt, and orange zest; once they’re all mixed together, add in your biscuit dough pieces, seal it up, and give it a good shake to coat everything. Dump all of the biscuit pieces into a bundt pan and set aside.

3. In a pan over medium heat, melt the butter. Stir in the brown sugar and vanilla, stirring until they’re all combined. Don’t let the sugar mixture start to boil though! Once they’re mixed, pour the goo on top of all your biscuit pieces in the pan. Give the pan a bit of a shake to help everything settle.

4. Place the pan in the oven and bake for about 25 minutes, until the tops of the biscuits start to turn a golden brown. Remove from the oven and allow to cool in the pan for 10 minutes. Do not let it rest any longer or it’ll stick in the pan!  After the 10 minutes, turn it out onto your serving plate.

5. While the bread is baking, beat the cream cheese in your mixer on a medium-high speed until it becomes super creamy. Gradually add in your icing sugar, and dilute with a bit of milk until you get a sort of runny consistency. Basically, you want it to be able to drip it onto the top of the cake and only drizzle down the sides a bit – so you shouldn’t need to add too much milk. Remember, your hot bread will cause it to melt and become even runnier!

6. After turning the bread out of your bundt pan, let it sit for about 5 minutes before drizzling on the cream cheese glaze.