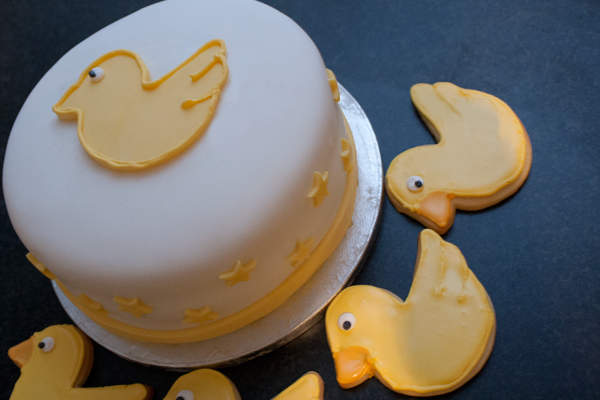
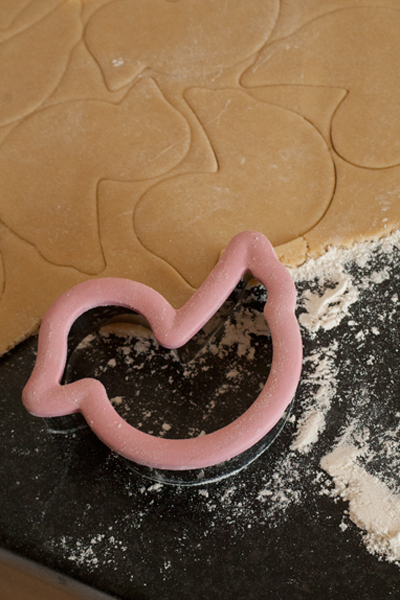
My mom has been baking these cookies since before I was born. When I was growing up, we’d make them for just about every holiday and we probably had about a hundred cookie cutters. Usually we’d make an icing from icing sugar, vanilla, and milk and use paintbrushes to decorate them. It was snowing the weekend I baked these, so with no where to go, I decided to try decorating with royal icing instead – and the results were AWESOME. To make the penguins, I used the Wilton Comfort Grips snowman cutter and decorated from there. It’s best to make the dough the night before you actually want to bake and decorate so that it has plenty of time to chill, as it works best when the dough is stiff.
Ingredients
- 1/4 cup shortening (baking fat)
- 1/2 cup (115 grams) butter, softened
- 1 cup sugar
- 2 eggs
- 1 teaspoon vanilla
- 2 and 1/2 cups flour
- 1 teaspoon baking powder
- 1 teaspoon salt
Directions

1. Mix shortening (baking fat), butter, sugar and eggs until blended, then add then vanilla.
2. Sift the flour, baking powder and salt together in separate bowl. Then gradually add the dry ingredients to the wet mixture.
3. Cover and chill the dough in the fridge for at least one hour. Again, it’s best to leave it overnight!
4. Heat oven to 400°F (200°C). Dust your work surface with flour, then roll out the dough with a floured rolling pin until it is 1/4 inch thick. Cut with the cookie cutters, then transfer to a baking sheet with a floured spatula.
5. Bake the cookies for 6-8 minutes until slightly brown at the edges. You’ll need to adjust the baking time for cookies that have finer details or smaller sizes (such as the snowflakes, or a thin candy cane shape). It works best if making multiple shapes to only use one shape per tray so that they bake evenly.
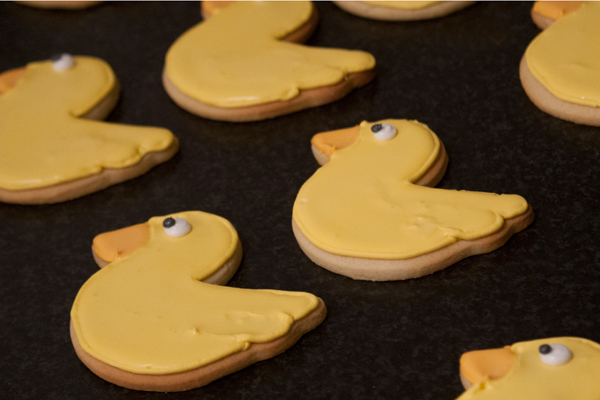
6. Transfer to a wire rack to cool, then pipe the decorations with royal icing.

When one tray of cookies are in the oven, I usually put the dough back in the fridge to keep it from getting too soft. Try not to handle the dough too much with your hands, as this will cause the butter to soften and the dough will get sticky and the cookies won’t hold their shape when transferring from your work surface to your baking sheet. Don’t be too worried about it though, if a cookie loses its shape, just toss it back in the dough bowl and pop all of it back in the fridge for a few minutes.