Chocolate Peanut Butter Pie

ChocolatePBPie_LR

It’s been a couple of weeks since Ben and I moved into our new home, and yet I still feel like I’m surrounded by boxes. Making a new space feel like your space takes time, and a lot of late nights. But things are coming along.

The biggest challenge of our new flat is having a smaller kitchen. Not so much in size, but in countertop and storage space, so we’ve had to get a bit creative in our kitchen storage, and make sure to keep everything super organised.

So my first bake in our new home is an old favorite for a site called Tracey’s Culinary Adventures. I first started making it when I moved to the UK, before I could find Reese’s cups anywhere. As I’m sure you all know, I’m pretty much obsessed with chocolate and peanut butter.

This pie is so easy, and requires minimal baking. The hardest part is waiting for the pie to chill before you can eat it!

CPBPie_LR

Ingredients

For the crust:

  • 1 3/4 cups chocolate cookie crumbs ( I used Oreos and removed the filling)
  • 6 Tablespoons unsalted butter, melted
  • 3 Tablespoons brown sugar 
  • pinch salt
For the filling:
  • 6 oz cream cheese, at room temperature
  • 3/4 cup icing sugar
  • 1 teaspoon kosher salt
  • 1 1/4 cups smooth peanut butter
  • 1 tablespoon vanilla extract
  • 2 cups heavy cream
To decorate:
  • 1 oz semisweet or dark chocolate, finely chopped
  • 2 tablespoons peanut butter

Directions

1. First make your pie crust: Preheat oven to 350°F (175°C) . Stir together the cookie crumbs, brown sugar, and salt. Pour over the melted butter and use a fork to blend into a wet mixture. Press this mixture into the bottom and sides of a 9-inch deep dish pie plate. Place the pan into the fridge for 15 minutes to set, then put into the oven to bake for 8-10 minutes. Remove and let cool completely.

2. Next, make the filling: In the bowl of your mixer, beat together the cream cheese, icing sugar, and salt. Before you add in the salt, taste your peanut butter. If your peanut butter is pretty salty to begin with, you won’t want to add any more to the filling, because it’ll make it wayyyy to salty. I find that the Tesco own label peanut butter has enough salt already and usually leave it out. Skippy peanut butter seems to work the best! Once the mixture has been beaten well, add in the peanut butter and vanilla and beat for a couple of minutes until it’s all blended together well.

3. Put the whisk attachment onto your mixer, then in a clean bowl, whisk the heavy cream until it is light and fluffy. Take about 1/3 of the whipped cream and add it to your cream cheese mixture by hand to help lighten it. Then use a spatula to gently fold in the rest of the whipped cream until all of stripes are gone and it’s evenly blended.

4.  Pour the filling into your cooled pie crust, then place in the freezer to chill for 4 hours. If you want to freeze it longer, make sure you cover it with plastic wrap.

CPBPie2_LR

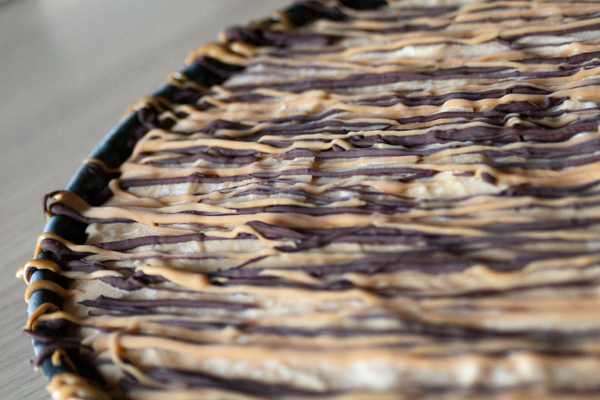
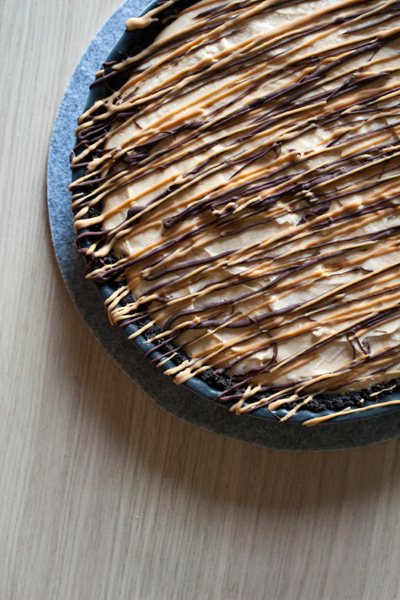
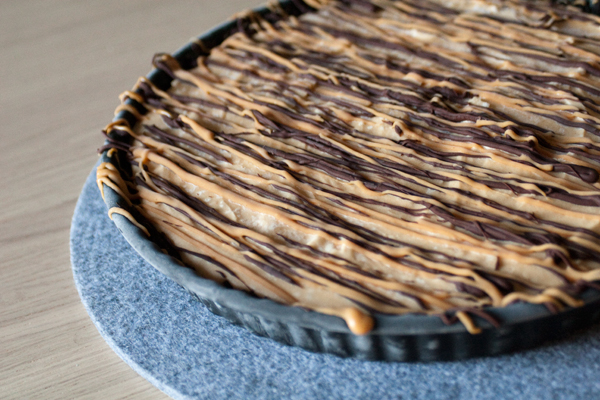
5. To decorate, melt the chocolate and peanut butter separately (You can melt the peanut butter on low heat on the stove top), then put each into a ziploc bag. Snip the corner of the bag, then quickly zig-zag across the top of your pie. Don’t worry about being precise, the faster you do it, the better it works!

Advertisement

Oreo Cheesecakes

For the past couple of weeks I’ve been craving making something with Oreos. They’re one of those cookies that once I get them on my mind, I have to eat one. They’re pretty much like crack.

These mini Oreo cheesecakes are simple and delicious! They’re from one of Martha Stewart’s recipes. Her version says that it makes 30, but I got quite a few more than that. Make sure you store these in the fridge until you’re ready to serve to avoid having them get mushy.

Ingredients

  • Oreo cookies, at least 30 (plus some extra in case you’re like me and manage to get a few more from the recipe)
  • 12 coarsely chopped Oreo cookies
  • 4 packages of cream cheese (about 900 grams)
  • 1 cup (225 grams) sugar
  • 1 teaspoon vanilla
  • 4 eggs, room temperature and lightly beaten
  • 1 cup sour cream
  • pinch of salt

Directions

1. Preheat oven to 275° F (135° C).  Line a cupcake pan with paper liners.  Place 1 whole Oreo cookie in the bottom of each lined cup.

2. In a large bowl, beat the cream cheese on medium-high speed until smooth, scraping down sides of the bowl as needed.  Gradually add the sugar, and beat until combined.  Mix in the vanilla.

3. Drizzle in the eggs, a little at a time, beating to combine and scraping down sides of bowl. Add in sour cream and salt, beat until combined.  Using a large spatula, fold in the chopped Oreo cookies. Do not use a mixer to mix in the Oreos, as they’re chop them up too much!

4. Fill each cookie-filled cup with a few spoonfuls of batter until each one is nearly filled to the top.  Bake, rotating muffin tins halfway through, until the filling is set, about 22 to 28 minutes.

5.  Transfer the cupcake pan to a wire rack to cool completely. Once cool, refrigerate them at least 4 hours (or overnight).  To help the cakes keep their shape better, leave them in the cupcake pan in the fridge.


Oreo Cheesecake Brownies

In my internet recipe hunting, I came across this recipe for Oreo Cheesecake Brownies from Sweet Pea’s Kitchen. I absolutely LOVE cheesecake brownies, and it had been a looooong time since I last had one. So combine my love for cheesecake, chocolate, AND Oreos?! How could it be any more perfect?

I gave these brownies a shot, and they were wonderful. However, this recipe only makes about a half-batch, so you may want to double up if you want to make a full 9×13 Pyrex dish’s worth. In a way this works out well, since I have 2 half-size Pyrex dishes, so I made one normal batch, and one batch with peppermint added to the cheesecake, which was also delicious. Also, I had to increase the baking time quite a bit – most likely due to using the deeper pans. So be sure to keep an eye on them to avoid over or under baking! You’ll know when they’re done when the cheesecake swirls start to brown on top a bit.

Ingredients

  • 1/2 cup (115 grams) unsalted butter
  • 3/4 cup granulated sugar
  • 1 package (8 oz) cream cheese, softened
  • 3/4 cup icing sugar
  • 2 teaspoons vanilla extract
  • 1 cup flour
  • 1/2 cup unsweetened dark cocoa powder
  • 1/2 teaspoon salt
  • 2 eggs
  • 1 1/3 cups coarsely chopped Oreo cookies

Directions

1. Preheat oven to 350° F (approx 175°C). Butter the bottom and sides of a 8 inch metal baking pan (I used glass Pyrex dishes for my brownies). Put a long piece of parchment paper in the bottom of the pan, letting the parchment extend up two sides of the pan and overhang slightly on both ends. (This will make it easy to remove the bars from the pan after they have baked. This is a must do!!) Butter the parchment.

2. In a small saucepan over medium heat, melt butter. Whisk in sugar and bring to a boil, whisking frequently; boil 1 minute. Set aside to cool for 5 minutes.

3. In a medium bowl, beat together cream cheese, confectioners’ sugar and vanilla extract until combined, about 1 minute using a hand mixer. This will be the cheesecake for your brownies. If you want to make the peppermint version, use 1 tsp of vanilla, and 1 tsp of peppermint extra. You can also swirl in some red food colouring if you’d like.

4. In a separate medium bowl, sift together flour, cocoa powder and salt; whisk until combined.

5. In a second large bowl, whisk together eggs until combined. Whisk in melted butter-sugar mixture until well combined. Stir in flour mixture until just combined, followed by Oreo cookies. Again, if you’re making the peppermint version and it’s around Christmas – try substituting with the red creme-filled Oreos for that extra holiday touch.

6. Bake for 24-28 minutes, until brownies and cheesecake are set. A knife inserted into the cheesecake mixture should come out clean and the edges will be lightly browned.

7. Let cool completely in pan on a cooling rack before lifting out the parchment paper to remove the brownies. Cut, and serve.