Mary Berry’s Florentines


florentines04 florentines07This week was biscuit week on Great British Bake Off and the technical challenge that the bakers had to complete were Mary Berry’s florentines.  Now, to help clarify, in the UK, biscuits aren’t simply synonymous with cookies. Biscuits tend to be a bit crispy or crunchy, whereas a cookie tends to be softer and chewier, especially in the center. It gets extra confusing when they make savory biscuits (with cheese and stuff in them), because in my head, those are crackers. Cookies are sweet and they certainly don’t have cheese in them!  Oh well, another one of those epicurean curiosities of living in another country.

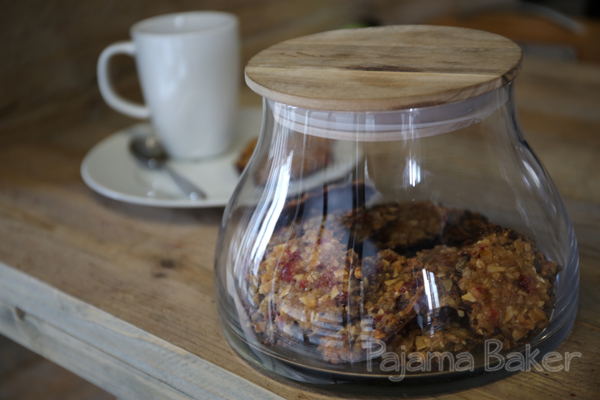
I decided to continue in my theme this season and follow along with all of the technical challenges, so I looked up Mary’s recipe that was used for the show to give these nutty, fruity, crunchy biscuits a go.  They were a bit trickier than last week’s cherry cake, but that’s because you have to be very precise when measuring them out so that they’re all equal. And even then, a couple of mine spread unevenly.


Ingredients

  • 50 grams butter
  • 50 grams demerara sugar (this is brown, unprocessed granulated sugar, sometimes called raw sugar in the States.)
  • 50 grams golden syrup (this is a sort of maple-syrup type thing, but lighter. You could substitute a really thick honey for a similar flavor.)
  • 50 grams flour
  • 25 grams dried cranberries or glacé cherries, finely chopped
  • 50 grams candied peel, finel chopped
  • 25 grams almonds, finely chopped
  • 25 grams walnut pieces, finely chopped
  • 200 grams plain chocolate, chopped into chunks

florentines01Directions

1. First, preheat your oven to 350° F (175°C). Line a few baking trays with baking paper, and set aside.

2. In a small pan over low heat, add the butter, sugar, and golden syrup. Heat gently until the butter melts. Once melted, remove the pan from the heat and add in the rest of your ingredients (except the chocolate!). It’ll form into a sticky, gooey mixture.

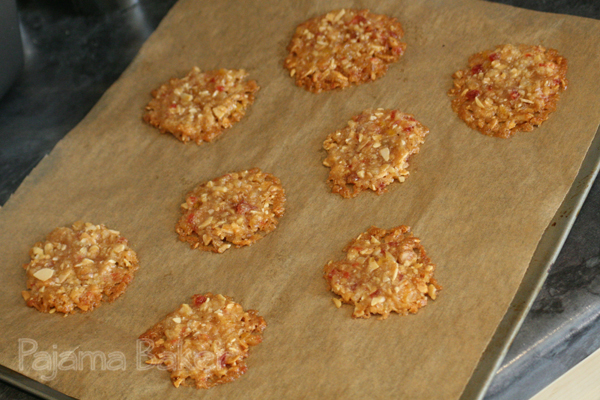
3. Now this is where it gets a bit tricky. You need to divide the dough into 18 biscuits. In theory, you could just add up all the weights and divide by 18 (so 18 grams each), but nope! Because the mixture is so sticky, you’re bound to lose a bit of weight to bits getting stuck to your hands or spoon or everything. So I measured mine out to be between 15 and 16 grams each to be sure I had that covered. Place each of your 18 dough balls evenly across your prepared baking sheets, making sure there’s plenty of room for them to spread.

florentines09

florentines08

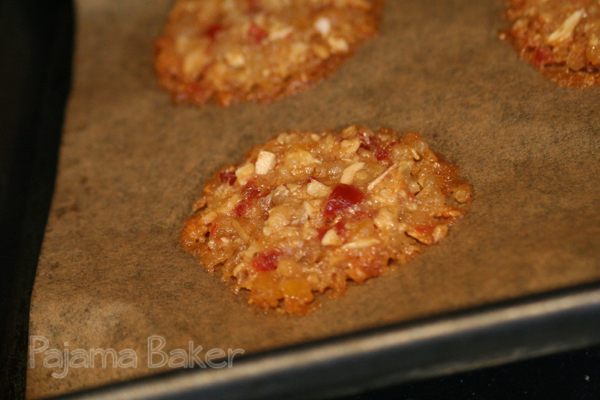
4. Bake for 8-10 minutes, until they turn a dark, golden brown around the edges. Remove them from the oven to cool, then carefully move them to a wire rack for the next stage. To quote Mary, the should have a “nice lacy texture” to them, with the edges uneven and you should be able to see through them a bit.

5. Temper your chocolate by heating half of it in a heatproof bowl over a pan of water on medium heat. Once it’s melted, remove the bowl from the heat and add in the rest of the chocolate. This should make your chocolate nice and shiny when it sets.

florentines02florentines06
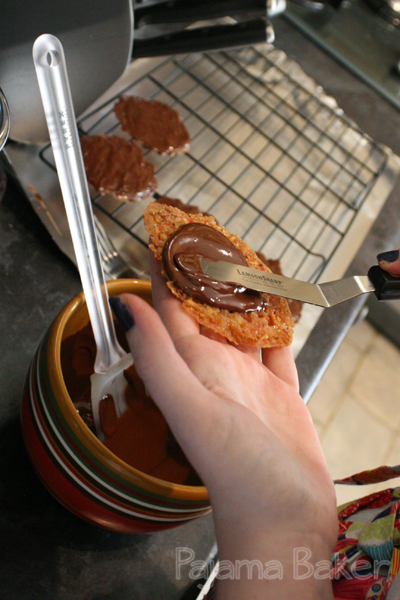
6. Using a palette knife, or offset spatula, gently coat the underside of your biscuit with the chocolate, and then place it upside down on a wire rack to set. Once the chocolate begins to set up, drag a fork back and forth through the chocolate to create the “signature zig zag” look. Then allow the chocolate to cool and set completely.

florentines03


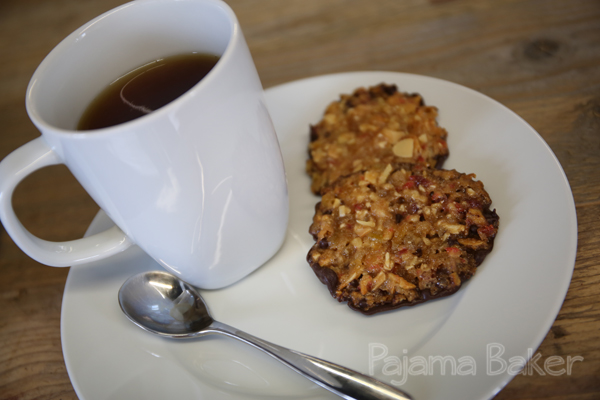
That’s it! Job done! I’m pretty sure my florentines would have landed me in the Top 5 for the technical challenge. 😉florentines05

Boston, World Champs!

Boston_1

Boston_3


So I made it home to Virginia in one piece, albeit slightly jet-lagged and extremely spacey. It’s been great to be home to see everyone.

I have a bit of a last minute and unexpected bake – my mom decided to throw a cookout (a barbecue, as the Brits call it) and have the whole family over so I could see everyone in one visit. The Boston Red Sox have just won the world series, so my mom wanted to have a Boston-themed get together.

My grandfather is the BIGGEST Red Sox fan you will ever meet. He’s loved them since he was a kid and has stuck by them through all the painful years of never quite making it to the World Series. He even has an entire room in his house dedicated to photos and memorabilia, a lot of it actually signed by different members of the team from over the years!

As my contribution towards our dual celebration (the Red Sox and my arrival), I did another batch of quick sugar cookies, but this time I decided to use royal icing to pipe the Boston emblem, some red socks, and (more topically) a few bearded baseballs  – as a token of luck, the entire team had grown beards.

Boston_2


Grandpa loved these cookies, and wouldn’t let anyone eat them at first! His only regret was us not telling him it was going to be a Boston-themed party so he could have worn the appropriate attire.

It’s been great being home, and I’m looking forward to a few days of relaxing and catching up with everyone. Hopefully this trip will really help me recharge and get ready to jump straight back in once I get back to London.

See you soon, bakers.

Halloween Cookies

HalloweenCookies

HalloweenCookies2


Happy Halloween bakers! As many of you may know – Halloween is my absolute favorite holiday and every October since I’ve moved to London, I feel a bit empty inside. The Brits don’t really celebrate Halloween the way the Americans do, so I find myself absolutely jealous at everyone’s amazing costumes and terrifying festivities. Last night I decided to do a bit of late-night baking and rushed home from work to make some sugar cookies.  Ben and I worked late into the night to decorate these ghoulish treats for my colleagues at the office. I reverted back to my old recipe of icing sugar + milk + coloring for the icing and painted it on with a brush.

In other news, I’m heading back across the Atlantic tomorrow to visit my family for a bit before heading over to Chicago to work from our company’s other office for a week. I’ll be back in a couple of weeks!


Pumpkin Chocolate Chip Cookies

pumpkinchocolatechip

The past couple weeks have once again been a whirlwind. My mom just came for a visit the past two weekends, so we spent some time wandering around London. On top of that, Ben just finished his time at university and has started a new job! All in the same week! He’ll be working in the graduate program while he finishes writing his PhD thesis.

This week, I just whipped up a quick batch of pumpkin cookies. I made these cookies last year and they were incredibly addicting. This year, I decided to ramp it up a bit by adding in chocolate chips, making them even more delectable! They were an easy bake to satisfy my sweet tooth while still allowing us to get back into our routines.

To make these super-quick cookies, check out the original pumpkin cookies recipe, and just add 2 cups of chocolate chips!

Cookie Dough Brownies

CookieDoughBrownies

I came across this recipe on another blog called Brown Eyed Baker. As soon as I read it, I knew they had to be this week’s bake. Cookie dough. And brownies. No brainer.

On top of baking this week, I also had to prep for a photoshoot at work. We’re reshooting all of our staff photos, but we’re also doing a second set of photos to display in the office showcasing all of the different personalities of the team. I went with the obvious route – being a baker – and I ended up making a huge mess of the front lobby! It was so much fun, and everyone was just laughing at the mess. Here’s just a taste of the photos from the shoot, with a huge thanks to our photographer James Robertson for helping capture the final image!  I’ll unveil the final image once we select it!

_MG_5128 _MG_5132 _MG_5140 _MG_5154 _MG_5172 _MG_5191 _MG_5205 _MG_5215 _MG_5225

Now, for the recipe! The best part about the cookie dough bit is it’s egg-free, so it’s safe to eat raw. I’m seriously contemplating keeping a bowl of this on hand for “emergencies”.

Ingredients

For the  brownies:

  • 4 ounces (113 grams) unsweetened chocolate, finely chopped
  • 1 cup (230 grams) butter, room temperature
  • 2 cups brown sugar
  • 4 eggs
  • 2 teaspoons vanilla extract
  • 1 cup flour
For the cookie dough:
  • ¾ cup butter
  • ¾ cup brown sugar
  • ¾ cup sugar
  • 3 Tablespoons milk
  • 1½ teaspoons vanilla
  • 1½ cups flour
  • 1 cup chocolate chips

Directions

1. First, make the brownies. Preheat oven to 325° F (160°C). Line a glass baking dish with aluminum foil, leaving some overlapping the sides so that you can remove them later, and butter the foil.

2. In a double boiler, melt the chocolate until it is smooth. Set aside to cool slightly. In the bowl of your mixer, cream the butter and brown sugar until light and fluffy. Beat in the eggs and vanilla, scraping the sides of the bowl as needed. Finally, mix in the melted chocolate.

3. Turn your speed down to low and mix in the flour until just combined. Spread the batter into your prepared pan, then bake for 25-35 minutes, until a toothpick comes out clean. Remove the brownies from the oven and set aside to cool COMPLETELY.

4. Once the brownies are completely cool, make the cookie dough top. In the bowl of your mixer, beat the butter and both types of sugar until light and fluffy. Add in the milk and vanilla, followed by the flour, and mix until just combined. Add in the chocolate chips and mix into the dough by hand.

5. Spread the cookie dough over the brownies with a spatula, creating an even layer. Gently press it down into the brownies so that the layers bond together. Cover and place in the fridge to set for at least an hour. Once set, slice and serve with plenty of milk!