Springtime Cupcakes

springcakes_03

It may be nearly a month late, but spring has finally come to London! Today was the first day that it’s gotten above 40°! In fact, it was nearly 70°! Ben and I had the balcony doors open to our flat and let the warm Southern breeze float through our living room – a welcome freshness to help air out an apartment that’s been hermetically sealed for the winter since October or November.

For some reason, it feels like winter lasts forever in the UK, but then one warm day and POOF! every single flower and tree is in full bloom and the grass is suddenly a bright shade of green as it soaks up the sunlight.

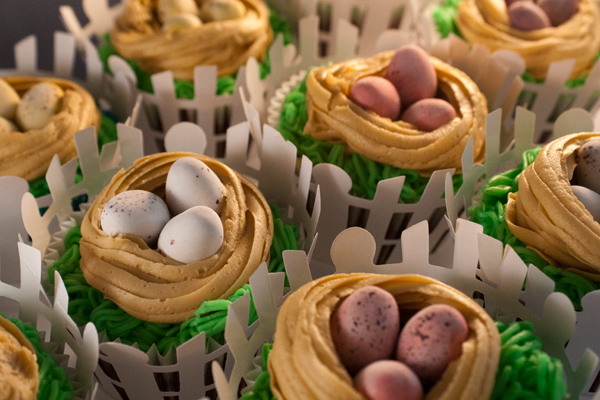
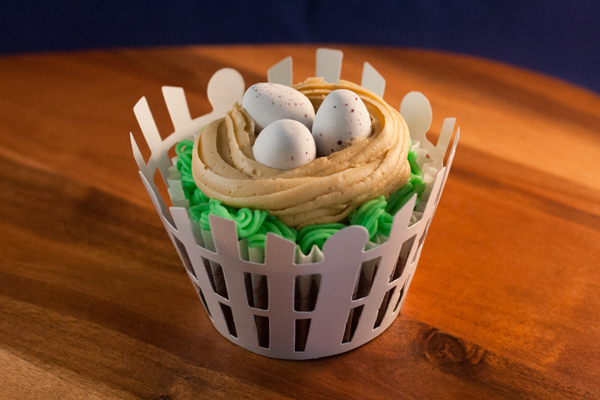
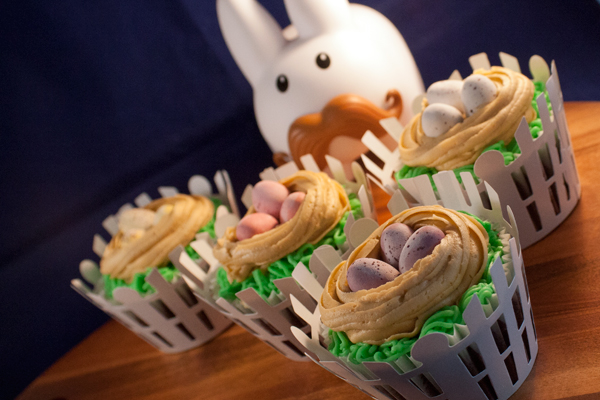
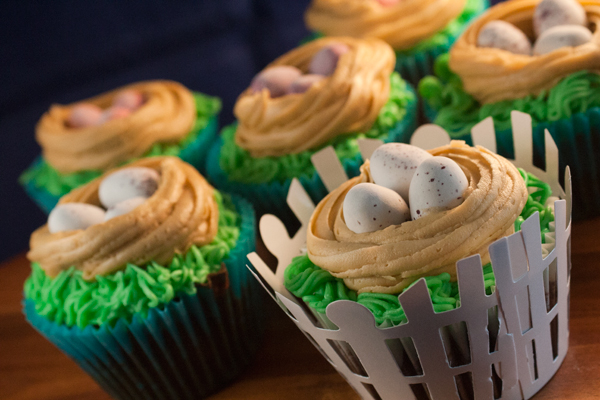
To welcome the season, here’s a simple cupcake that will bring the spring from outside in to your kitchen.

springcakes_01springcakes_02

Ingredients

For the cupcakes (makes 12):

  • 1/2 cup (115 grams) butter, softened
  • 1/2 cup (100 grams) sugar
  • 2 eggs, lightly beaten
  • 2/3 cup (100 grams) flour
  • 1 1/2 teaspoons baking powder
  • 1/3 teaspoon salt
  • 1/4 cup (30 grams) cocoa powder
For the frosting:
  • 6 Tablespoons (86 grams) butter, softened
  • 1 1/3 cups (160 grams) icing sugar
  • 1 Tablespoon milk
  • 1/2 teaspoon vanilla
  • 36 chocolate minieggs

springcakes_05

Directions

1. Preheat oven to 350° F (175°C). Place cupcake liners into the pan.

2. In the bowl of your mixer, cream together the butter and sugar until light and fluffy, about 3 minutes; then beat in the eggs one at a time.

3. Gently mix in the flour, baking powder, salt, and cocoa powder, being careful not to overmix.

4. Spoon the batter into your cupcake liners, then place in the oven to bake for 15 minutes. Be sure to keep an eye on them, as chocolate cupcakes have a tendency to dry out really quickly. Once they’re finished, allow them to cool in the pan for 10 minutes before transferring to a wire rack to cool completely.

5. To make the buttercream, place your butter into the bowl of your mixer, and beat it on medium-high speed until it’s light and fluffy. Then, lower your speed and gradually mix in the icing sugar. Beat until they are well mixed, then add in the milk and vanilla. Divide your batter by thirds, dying one third green and the other two thirds brown. Place each frosting color into a piping bag.

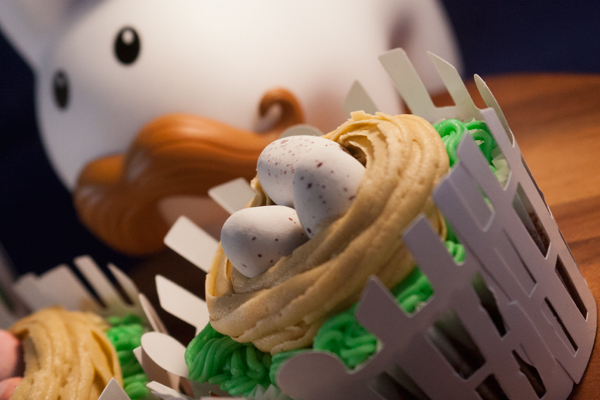
6. Fit the green piping bag with a grass-type decorating tip (it has a bunch of little holes in it). Roughly pipe the grass around the outer rim of your cake, lifting and releasing the pressure each time so that it breaks up into several ‘tufts’ of grass. Fit the brown pastry bag with a flower-type decorating tip. Use this bag to create your nests by swirling it around while leaving the middle hollow. Arrange three minieggs into each nest to finish.

springcakes_04

Pretzel Rolls

PretzelRolls_04

It’s been a busy couple of weeks here in London! If that means anything, it means that spring is on its way. Projects have been picking back up at work, my dad came for a visit over the Easter holidays, and Ben got a job offer for when he finishes his PhD this fall. Now if only the weather would actually warm up and the sun would come out – then it would really be spring!

After a couple of weeks off from baking, it was time to dive back in and get my hands dirty – literally. Because this week was bread week!

I found these pretzel rolls through Pinterest, and was instantly drawn to them. I’d actually been craving the salty, yet buttery taste of a warm, soft pretzel. Plus they were so simple – actually much simpler than normal pretzels (which was a bit of a mission last time I made them).

The recipe is pretty much exactly the same, just a smaller batch and using water instead of milk.  I also noticed that the dough was a bit more durable (for want of a better word) – so it would work really well for making normal pretzels too. This recipe makes 8 3-inch (ish) rolls, which are perfect for sandwiches – a few slices of roast beef, a bit of mustard, and you’re golden. Or, you can be like me and just tear them apart and eat them straight from the oven.

PretzelRolls_02

Ingredients

  • 1 1/2 cups warm water
  • 2 Tablespoons brown sugar
  • 1 packet active dry yeast
  • 5 Tablespoons (72 grams) butter, melted
  • 2 1/2 teaspoons salt
  • 4 cups bread flour
  • olive oil
  • 3/4 cup baking soda
  • coarse sea salt

Directions

1. In the bowl of your mixer fitted with a dough hook (or just a large bowl), pour in the warm water, brown sugar, yeast, and melted butter. Give them a gentle stir to bring them together, then allow them to sit for 5 minutes to allow the yeast to activate.

2. Mix together the flour and salt in a separate bowl so that the salt won’t come in direct contact with the yeast, because this would kill the yeast. Once they’re mixed, add them to your mixer and mix on a low speed until everything is combined. Increase the speed to medium and allow the dough to knead for 3-4 minutes, until it pulls away cleanly from the sides of the bowl.  You can knead the dough by hand if you’d like – it’s a good workout for the arms!

3. Coat a clean large bowl with a bit of olive oil to help prevent the dough from sticking to it. Place the kneaded dough in the bowl, cover, and allow to rise until it’s doubled in size – about an hour.

4. When your dough has risen, preheat your oven to 425°F (210°C) and line two baking sheets with parchment paper. Bring a pot of water to boil, then slowly add in the baking soda. Don’t add it too quickly, because sometimes it’ll bubble over. PretzelRolls_03

5. Divide your dough into 8 evenly-sized chunks (or make them smaller, bite-size rolls if you’d like – just remember to reduce your baking time) then shape them into a nice roll. Place each dough ball into the boiling water for 30 seconds. This will give your rolls the deep brown colour that’s characteristic of pretzels! Set each roll on your prepared baking sheet and sprinkle liberally with the sea salt while it’s still wet, then cut an ‘X’ into the top of each roll.

6. Bake your rolls for about 15 minutes until they reach that deep golden brown. Once finished, remove them immediately onto a wire rack to cool so that the bottoms don’t get soggy. Then either eat them on their own or slice and make into sandwiches! These rolls will easily keep 2-3 days if kept in a paper bag, or covered in a clean cloth. Don’t put them in plastic containers or bags, because the moisture will condense and make your rolls soggy.

PretzelRolls_05


Peanut Butter Cup Brownie Cake

chocolatepeanutbuttercake

Usually when I get a craving for chocolate and peanut butter, I make something with it, stuff my face, and the craving subsides. However last week’s cookies didn’t seem to subdue my cravings, as they carried into this weekend. I was wondering what I should make, and I kept trying to think of how I wanted to marry these two amazing flavors.

And then I found it.

I was perusing one of my favorite baking blogs, Sprinkle Bakes, when I found this recipe for her peanut butter cup brownie cake: three dense chocolate brownie layers separated by creamy peanut butter. I couldn’t resist. I had to make it.

And boy was this a monster! This cake was so tall that the Reese’s cups on top were scraping the top of my cake carrier, easily crowning it as the tallest cake I’ve made to date. But it was delicious and it totally cured my craving.

Sprinkle Bakes recommends very thin slices (25 slices per 9-inch cake), and that was seriously correct. In fact, the richness of this cake lended itself to making it one of the few of my bakes to last two days in our office – and that’s quite an achievement.

So if you decide to bake this cake, proceed with caution. And if you get a massive sugar rush, don’t say I didn’t warn you! 🙂

Ingredients

For the brownie layers:

  • 1 1/2 cups (345 grams) butter
  • 6 ounces baking chocolate, chopped
  • 3 cups sugar
  • 5 eggs
  • 1 1/2 teaspoons vanilla
  • 1 1/2 cups flour
  • 3/4 teaspoon salt
  • 1/2 teaspoon salt
  • 1/2 teaspoon baking soda
For the peanut butter layers:
  • 6 cups icing sugar
  • 2 cups creamy peanut butter
  • 1/2 cup (115 grams) butter, melted
  • 1/4 cup double/heavy cream
For the chocolate frosting and decorating:
  • 1 1/2 cups (345 grams) butter, softened
  • 1 1/4 cups icing sugar
  • 1/2 cup cocoa powder
  • 2 teaspoons vanilla
  • 2 teaspoons brewed coffee
  • 8 peanut butter cups, cut in half
  • chocolate shavings

Directions

1. First make the peanut butter layers. In the bowl of your mixer, blend together the icing sugar, peanut butter and melted butter until it forms a crumbly mixture. Add the cream 1 Tablespoon at a time until it forms a thickened dough that you can work with (like sugar cookie dough). It should hold together if you squeeze it into a ball. Line two 9-inch cake tins with parchment and butter the pan. Then divide the dough evenly between the two pans, and press it firmly into each tin to form the peanut butter layers. Place them in the freezer to set while you make the brownie layers.

2. Next, make the brownie layers. preheat your oven to 350°F (175°C). Grease 3 9-inch cake tins, line with parchment, and flour each pan.

3. In a large saucepan over medium-low heat, melt the butter and chocolate, stirring until smooth. Once everything is melted, remove the pan from the heat and whisk in the sugar, followed by the eggs. Stir in the flour, salt, and baking soda.

4. Divide the dough between the three prepared cake tins and bake for about 25 minutes until they’re done. Allow them to cool in the pan for 10 minutes before turning out to cool on a wire rack completely.

5. Once everything is cool, prepare your frosting. In the bowl of your mixer, beat the butter and icing sugar together. Switch the attachment to the whisk, scrape down the sides of the bowl, and beat again until light and creamy.  Next, add in the cocoa powder, vanilla, and coffee. Mix on high until everything is incorporated and the mixture is light and airy.

6. Now you’re ready to assemble. Place your first brownie layer on the base and coat with a very thin layer of your frosting. Next, turn out one of your peanut butter layers and place in on top of the brownie layer. Coat the peanut butter layer with a small amount of coffee, then repeat. Your layers should be: brownie, peanut butter, brownie, peanut butter, brownie.

7. Once all of your layers are assembled, coat the top and sides with another thin layer of frosting, Place the rest of your icing into a piping bag and use it to pipe 11 rosettes around the top rim of the cake, and 4 more in the middle. Place each Reese’s cup half into each rosette. To finish it all off, sprinkle some chocolate shavings over the top of the entire cake.

pbcake2


pbcake


(Just ignore the slight leaning of my cake. It still tasted good!)

Double Chocolate and Peanut Butter Cookies

chocolatepeanutbuttercookies

In my continued theme of quick and simple bakes, I made double chocolate and peanut butter cookies. To make these, I used a bag of Reese’s peanut butter chips that I brought back with me from the States after Christmas (However, I did see these on Amazon for those of you in the UK). I think next time I made these, I want to try them with Reese’s Pieces, just to get the color added in. The oranges and yellows would look awesome against the dark chocolate color of the cookie.

I adapted this recipe from the one provided with the chips, but I added in more chocolate (of course!). It makes a TON of cookies – I got nearly 5 dozen out of it – so you’ll have plenty to share!

Ingredients

  • 2 cups flour
  • 3/4 cup cocoa powder
  • 1 teaspoon baking soda
  • 1/2 teaspoon salt
  • 1 1/4 cup (288 grams) butter, softened
  • 2 cups sugar
  • 2 eggs
  • 2 teaspoons vanilla
  • 1 package Reese’s Peanut Butter Chips
  • 2 cups chocolate chips

Directions

1. Preheat your oven to 350°F/175°C.

2. In a large bowl, sift together the flour, cocoa powder, baking soda, and salt.

3. In the bowl of your mixer, beat together the butter and sugar until light and fluffy. Add in the eggs and vinall and mix well.

4. Add in the flour mixture and beat well. Finally, stir in the peanut butter chips and chocolate chips.

5. Place rounded tablespoons of the cookie dough onto a baking pan. (As usual, I used my favorite tool – the cookie dough baller!) Bake them for 8-9 minutes. Allow them to cool on the pan for about 10 minutes before moving to a wire rack to cool completely.

Raspberry and White Chocolate Muffins

RaspberryMuffins

For some reason this week, the raspberries in the grocery store were calling my name. I wanted to make something relatively quick and easy, so I decided on these muffins, and boy were they worth it!  With the sweetness of the cake and chocolate, combined with the slightly tart bite of the raspberries, I could have sat and eaten all of them in one go!

This recipe came from a church cookbook that Ben’s dad gave me for Christmas. I find that church cookbooks are often some of the best, because the recipes are truly homemade and not perfected in some professional kitchen. Plus, the money from sales goes to a good cause, rather than someone’s pocket. 🙂

The key to making these muffins is to gently fold in the raspberries by hand at the last minute before pouring into your cupcake tin. That way, the raspberries don’t burst open and turn the whole batter pink.

Ingredients

  • 300 grams flour
  • 2 teaspoons baking powder
  • 150 grams sugar
  • 1 egg
  • 1 teaspoon vanilla
  • 225 milliliters milk
  • 50 grams butter, melted
  • 100 grams raspberries
  • 75 grams white chocolate chips

Directions

1. Preheat your oven to 400°F/200°C. Prepare your muffin tin by lining it with baking cases.

2. Sift together the flour and baking poder into a large bowl, then stir in the sugar.

3. In a small bowl, whisk together the egg, vanilla, and melted butter. Pour this mixture into the flour mixture and stir together, then add in the chocolate chips. Finally, gently fold in the raspberries, trying to avoid breaking them open as much as possible.

4. Divide the batter amongst the baking cases, filling each one about 2/3 full. Bake for 30 minutes until they rise above the cases and just start to turn golden on top.