The Elvis Cupcake

ElvisCupcakes

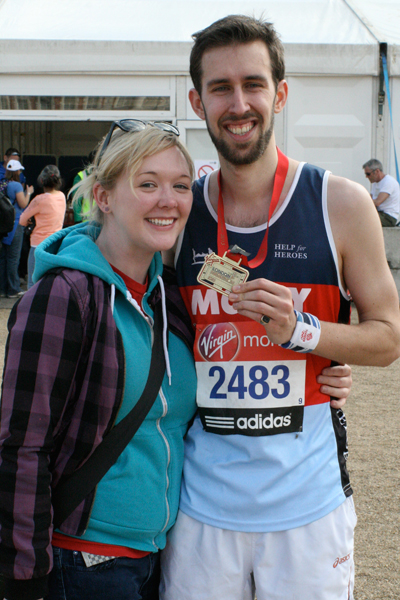
We had a couple of bananas sitting in our fruit bowl this weekend that were looking pret-ty ripe. They were leftover from Ben’s last week of marathon training, as he ran the London Marathon last weekend!  So instead of baking last week, I was standing on the sidelines, cheering on thousands of runners as we waited for Ben to pass. He did really well and finished in 4:09:32, not bad for a first marathon!

IMG_6177_2


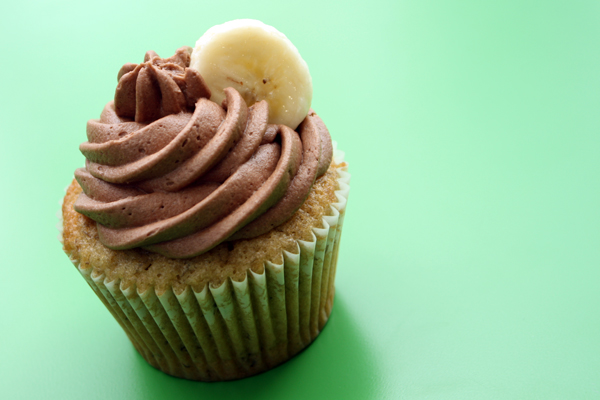
Back to the bananas…Their depressingly faded yellow peels covered in brown freckles were just begging to be put out of their misery. Instead of tossing them, I decided to make an old favorite: Elvis cupcakes.

Why Elvis? Because apparently the man loved peanut butter and banana sandwiches. Only these cakes take it a step further with a chocolate buttercream frosting. You may now be wondering where the peanut butter is if it isn’t in the frosting and the answer is the best surprise of this cake: a creamy peanut butter center!

While the flavor combination sounds like a strange amalgamation, you’d be amazed at how good these cakes taste!

Ingredients

For the cupcakes (makes 9):

  • 1 cup + 2 Tablespoons flour (preferably cake flour, if you have it)
  • 1/2 teaspoon baking soda
  • 1/4 teaspoon baking powder
  • 1/4 teaspoon salt
  • 1 whole overly ripe banana
  • 2 Tablespoons buttermilk
  • 1/2 teaspoon vanilla
  • 1/4 cup (58 grams) butter, softened
  • 1/2 cup + 2 Tablespoons + 1 1/4 teaspoons sugar
  • 1 egg

For the peanut butter filling:

  • 1/3 cup creamy peanut butter
  • 1 Tablespoon butter, softened
  • 3 1/2 Tablespoons icing sugar

For the chocolate buttercream:

  • 1/2 cup (115 grams) butter, softened
  • 1 Tablespoon milk
  • 3 ounces semisweet chocolate
  • 1/2 teaspoon vanilla
  • 5/8 cup icing sugar

Directions

1. Preheat oven to 350° F (approx 175°C). Place cupcake liners into the pan.

2. In a medium bowl, sift together the flour, baking powder, baking soda, and salt. In a smaller bowl, mix the vanilla and buttermilk.

3. In the bowl of your mixer, cream together the butter and sugar until light and fluffy, then beat in the egg. Once everything is incorporated, mash in the banana and mix well.

4. Stir in the sifted dry ingredients, alternating each addition with the buttermilk mixture. Make sure everything is blended in and smooth before adding the next addition. Once the batter is completely mixed, fill your prepared cupcake pans – filling each cup about 2/3 full.

5. Bake the cakes for about 17 minutes, or until a cake tester comes out clean. Rotate the pans halfway through the baking time. Once they are ready, let them cool in the pan for about 10 minutes before transferring to a wire rack to cool completely.

6. To make the peanut butter filling, beat the peanut butter and butter together until creamy.  Sift the icing sugar into the bowl and beat until light and fluffy, about 2 minutes.  Cut a hole into the top of each cupcake and spoon the filling into the hole, or using a piping bag with a filling tip (my method of choice).

7. To make the chocolate buttercream, melt the chocolate in the top of a double boiler until no clumps remain, and it’s completely smooth. Remove from the heat and allow to cool while you prepare the rest (about 5 – 10 min).

8. In medium sized bowl, beat butter for 3 minutes, until very very creamy.  Add the milk and beat until smooth.  Add the cooled melted chocolate and beat well. Add vanilla and whip for 3 more minutes.  Gradually add the sugar and beat until it’s nice and airy, then fill a piping bag and pipe onto the cakes.

Springtime Cupcakes

springcakes_03

It may be nearly a month late, but spring has finally come to London! Today was the first day that it’s gotten above 40°! In fact, it was nearly 70°! Ben and I had the balcony doors open to our flat and let the warm Southern breeze float through our living room – a welcome freshness to help air out an apartment that’s been hermetically sealed for the winter since October or November.

For some reason, it feels like winter lasts forever in the UK, but then one warm day and POOF! every single flower and tree is in full bloom and the grass is suddenly a bright shade of green as it soaks up the sunlight.

To welcome the season, here’s a simple cupcake that will bring the spring from outside in to your kitchen.

springcakes_01springcakes_02

Ingredients

For the cupcakes (makes 12):

  • 1/2 cup (115 grams) butter, softened
  • 1/2 cup (100 grams) sugar
  • 2 eggs, lightly beaten
  • 2/3 cup (100 grams) flour
  • 1 1/2 teaspoons baking powder
  • 1/3 teaspoon salt
  • 1/4 cup (30 grams) cocoa powder
For the frosting:
  • 6 Tablespoons (86 grams) butter, softened
  • 1 1/3 cups (160 grams) icing sugar
  • 1 Tablespoon milk
  • 1/2 teaspoon vanilla
  • 36 chocolate minieggs

springcakes_05

Directions

1. Preheat oven to 350° F (175°C). Place cupcake liners into the pan.

2. In the bowl of your mixer, cream together the butter and sugar until light and fluffy, about 3 minutes; then beat in the eggs one at a time.

3. Gently mix in the flour, baking powder, salt, and cocoa powder, being careful not to overmix.

4. Spoon the batter into your cupcake liners, then place in the oven to bake for 15 minutes. Be sure to keep an eye on them, as chocolate cupcakes have a tendency to dry out really quickly. Once they’re finished, allow them to cool in the pan for 10 minutes before transferring to a wire rack to cool completely.

5. To make the buttercream, place your butter into the bowl of your mixer, and beat it on medium-high speed until it’s light and fluffy. Then, lower your speed and gradually mix in the icing sugar. Beat until they are well mixed, then add in the milk and vanilla. Divide your batter by thirds, dying one third green and the other two thirds brown. Place each frosting color into a piping bag.

6. Fit the green piping bag with a grass-type decorating tip (it has a bunch of little holes in it). Roughly pipe the grass around the outer rim of your cake, lifting and releasing the pressure each time so that it breaks up into several ‘tufts’ of grass. Fit the brown pastry bag with a flower-type decorating tip. Use this bag to create your nests by swirling it around while leaving the middle hollow. Arrange three minieggs into each nest to finish.

springcakes_04

Pretzel Rolls

PretzelRolls_04

It’s been a busy couple of weeks here in London! If that means anything, it means that spring is on its way. Projects have been picking back up at work, my dad came for a visit over the Easter holidays, and Ben got a job offer for when he finishes his PhD this fall. Now if only the weather would actually warm up and the sun would come out – then it would really be spring!

After a couple of weeks off from baking, it was time to dive back in and get my hands dirty – literally. Because this week was bread week!

I found these pretzel rolls through Pinterest, and was instantly drawn to them. I’d actually been craving the salty, yet buttery taste of a warm, soft pretzel. Plus they were so simple – actually much simpler than normal pretzels (which was a bit of a mission last time I made them).

The recipe is pretty much exactly the same, just a smaller batch and using water instead of milk.  I also noticed that the dough was a bit more durable (for want of a better word) – so it would work really well for making normal pretzels too. This recipe makes 8 3-inch (ish) rolls, which are perfect for sandwiches – a few slices of roast beef, a bit of mustard, and you’re golden. Or, you can be like me and just tear them apart and eat them straight from the oven.

PretzelRolls_02

Ingredients

  • 1 1/2 cups warm water
  • 2 Tablespoons brown sugar
  • 1 packet active dry yeast
  • 5 Tablespoons (72 grams) butter, melted
  • 2 1/2 teaspoons salt
  • 4 cups bread flour
  • olive oil
  • 3/4 cup baking soda
  • coarse sea salt

Directions

1. In the bowl of your mixer fitted with a dough hook (or just a large bowl), pour in the warm water, brown sugar, yeast, and melted butter. Give them a gentle stir to bring them together, then allow them to sit for 5 minutes to allow the yeast to activate.

2. Mix together the flour and salt in a separate bowl so that the salt won’t come in direct contact with the yeast, because this would kill the yeast. Once they’re mixed, add them to your mixer and mix on a low speed until everything is combined. Increase the speed to medium and allow the dough to knead for 3-4 minutes, until it pulls away cleanly from the sides of the bowl.  You can knead the dough by hand if you’d like – it’s a good workout for the arms!

3. Coat a clean large bowl with a bit of olive oil to help prevent the dough from sticking to it. Place the kneaded dough in the bowl, cover, and allow to rise until it’s doubled in size – about an hour.

4. When your dough has risen, preheat your oven to 425°F (210°C) and line two baking sheets with parchment paper. Bring a pot of water to boil, then slowly add in the baking soda. Don’t add it too quickly, because sometimes it’ll bubble over. PretzelRolls_03

5. Divide your dough into 8 evenly-sized chunks (or make them smaller, bite-size rolls if you’d like – just remember to reduce your baking time) then shape them into a nice roll. Place each dough ball into the boiling water for 30 seconds. This will give your rolls the deep brown colour that’s characteristic of pretzels! Set each roll on your prepared baking sheet and sprinkle liberally with the sea salt while it’s still wet, then cut an ‘X’ into the top of each roll.

6. Bake your rolls for about 15 minutes until they reach that deep golden brown. Once finished, remove them immediately onto a wire rack to cool so that the bottoms don’t get soggy. Then either eat them on their own or slice and make into sandwiches! These rolls will easily keep 2-3 days if kept in a paper bag, or covered in a clean cloth. Don’t put them in plastic containers or bags, because the moisture will condense and make your rolls soggy.

PretzelRolls_05